Timesheets v2 is the latest and enhanced version of the Guardhouse Timesheets feature. This update was designed to address limitations and issues encountered in the previous version, while introducing several functional improvements to streamline operations and reporting.
Timesheets v2 offers expanded approval options, providing greater flexibility and control over timesheet validations. It also introduces improved visibility through the addition of invoicing and payroll summaries directly within the Summary column, making it easier to review and reconcile records. Additionally, approved timesheets can now be shared with subcontractors, improving collaboration and transparency.
If you are interested in trying out Timesheets v2, please contact Guardhouse Support or schedule a demo with your Success Manager to learn more about the feature and its benefits.
Approving / Rejecting Timesheets
1. On the Schedule page, create rosters as normal and publish them. Only published and/or confirmed shifts flow to the Timesheets section.
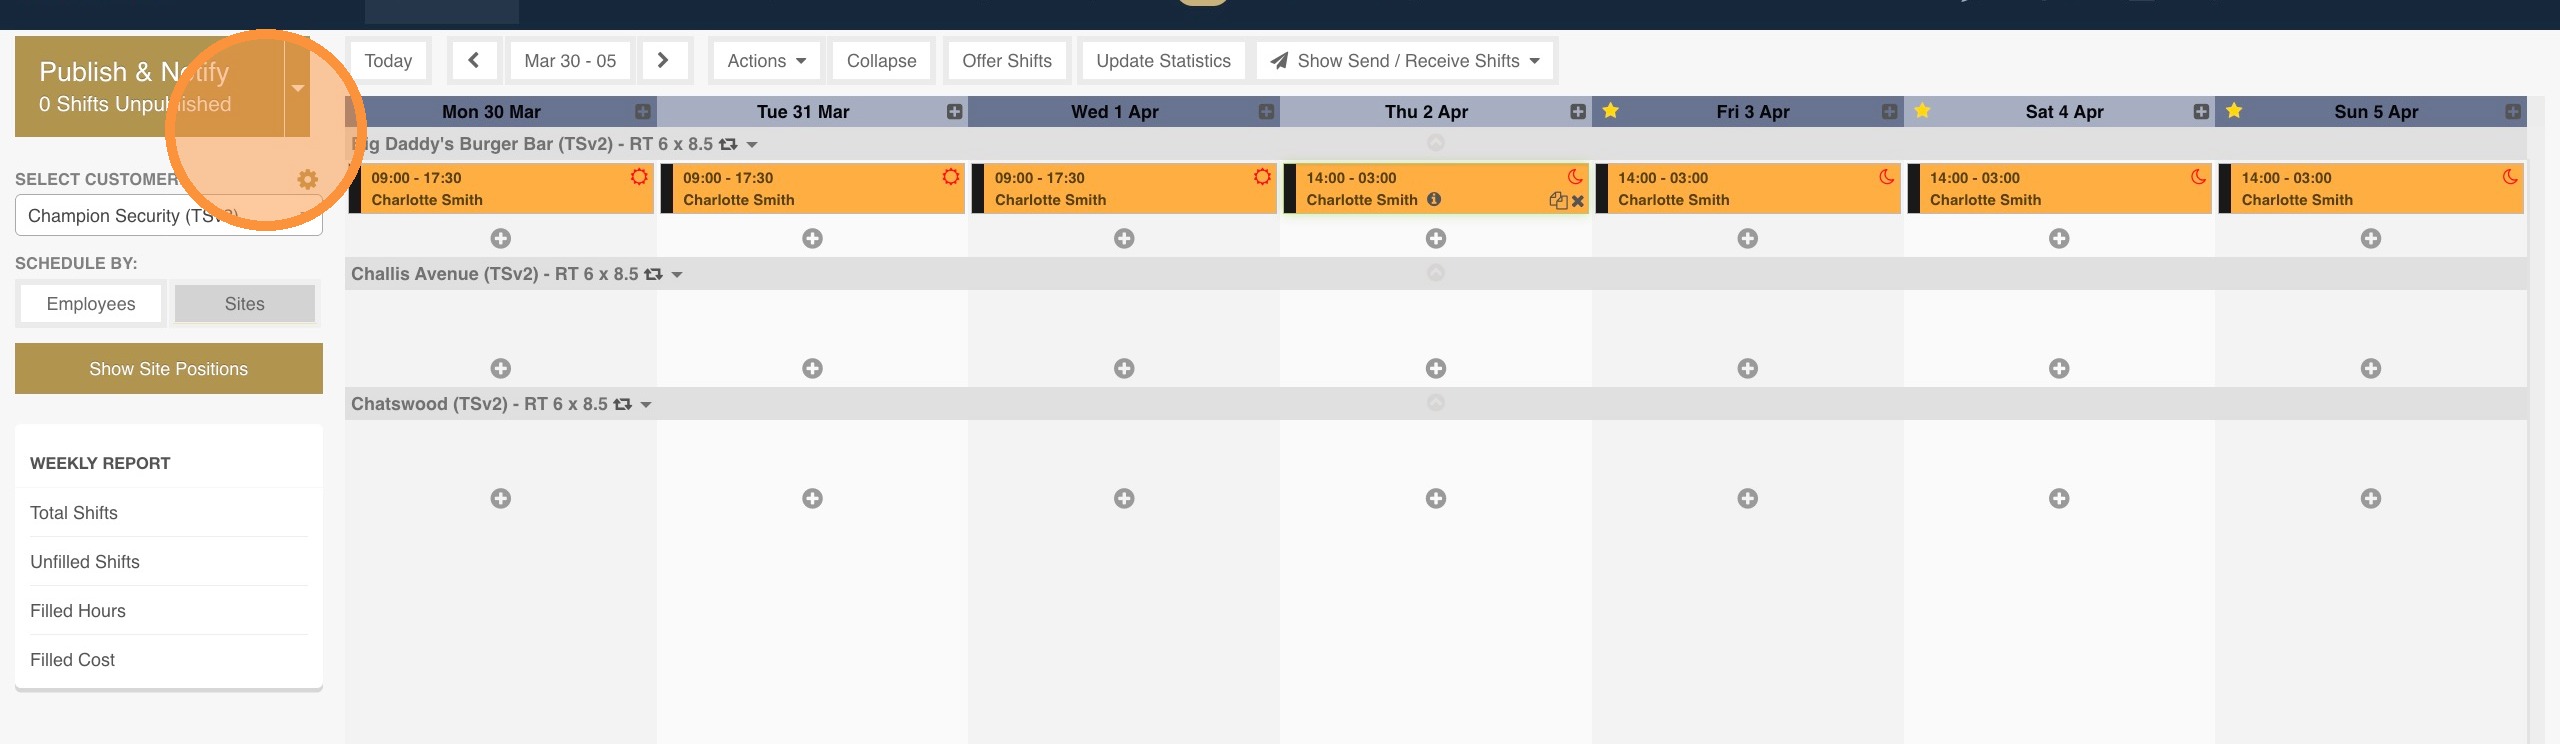
2. Add allowances on the Schedule page as needed.
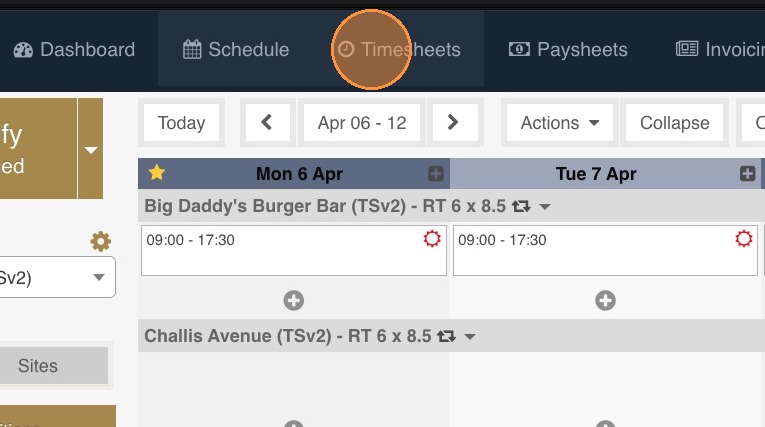
3. Go to Timesheets.
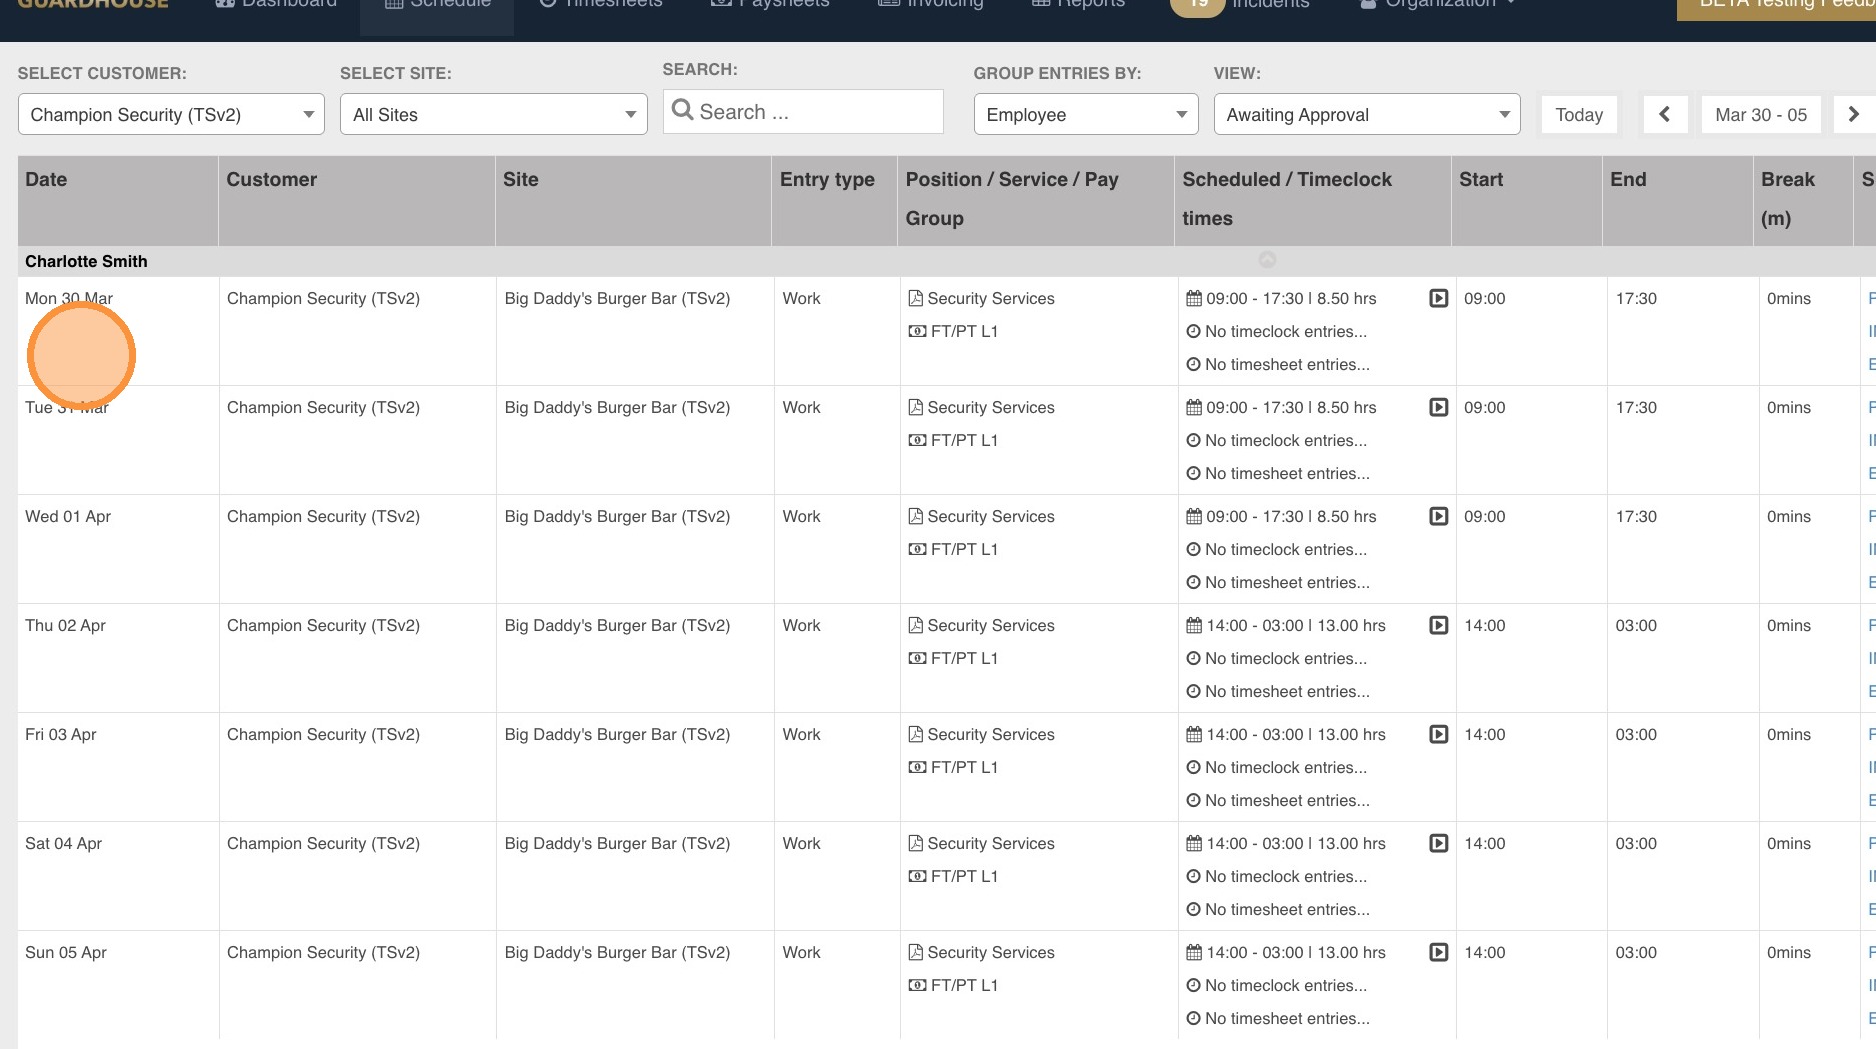
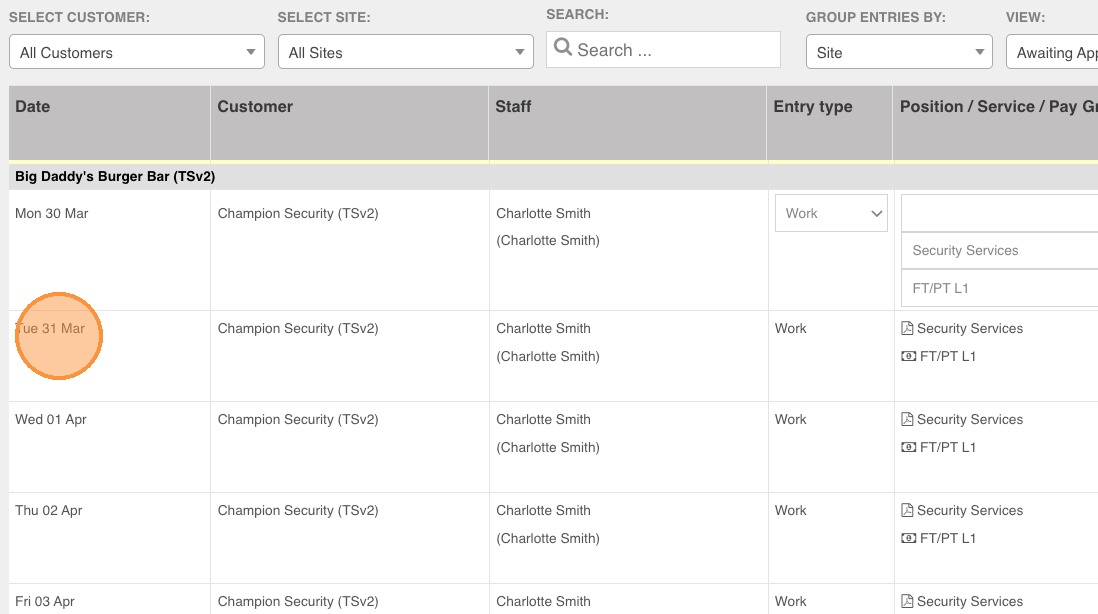
4. Choose the customer you would like to approve the timesheets for. You can filter by customer or all customers. You can also filter by site or all sites.
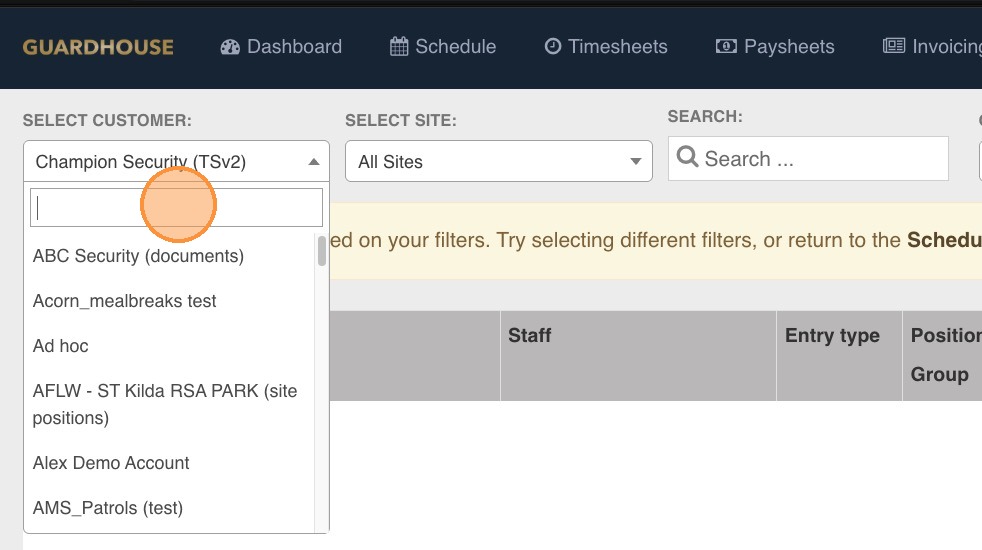
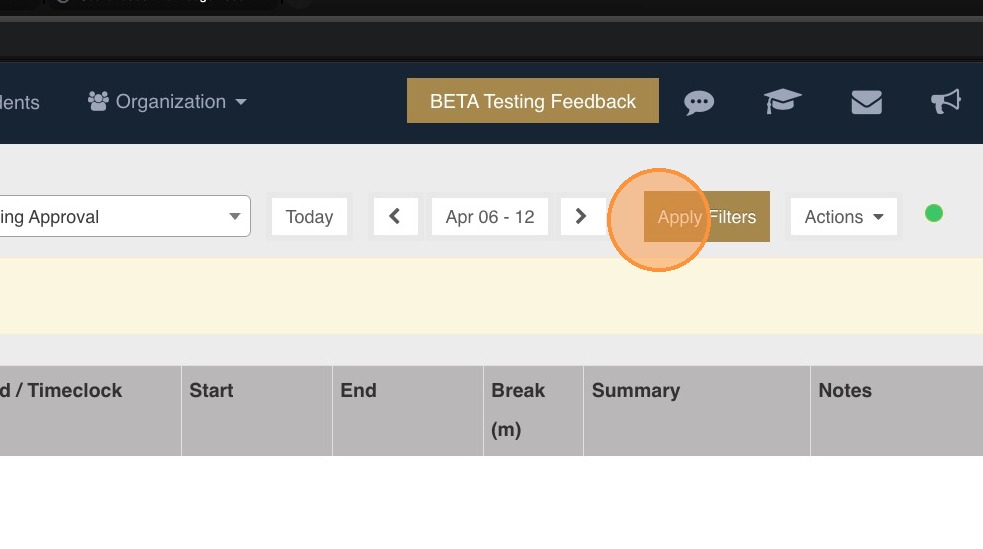
5. Note: Use the Apply Filters option for custom filtering.
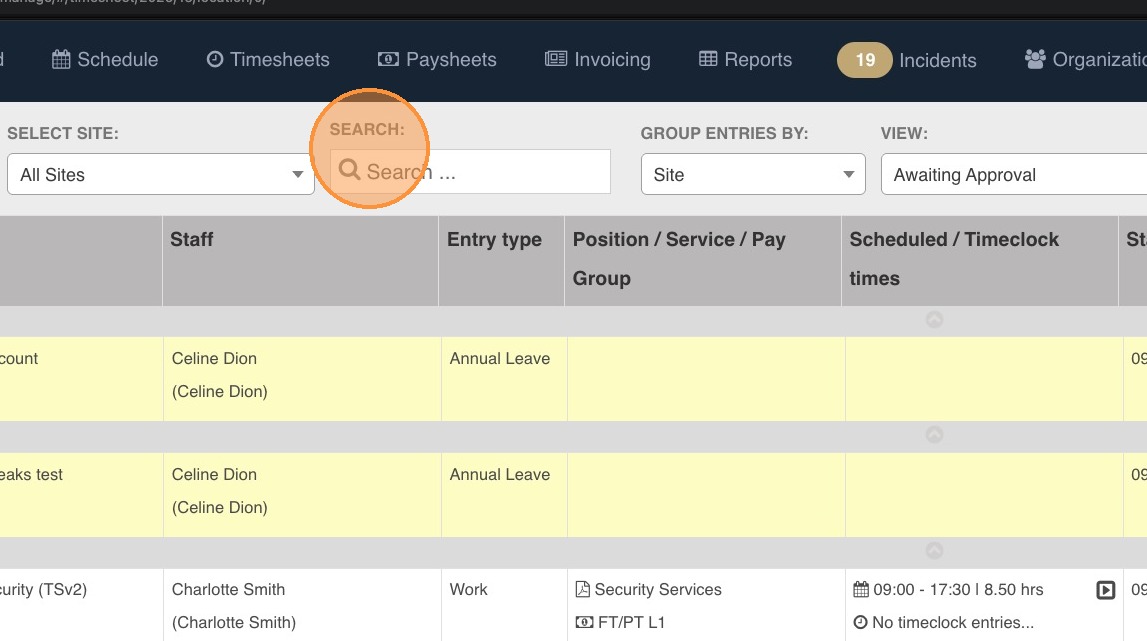
6. You can also use the Search Field to filter data by employee using specific keywords. this will filter across different Views (Approved, Awaiting Approval, and Rejected).
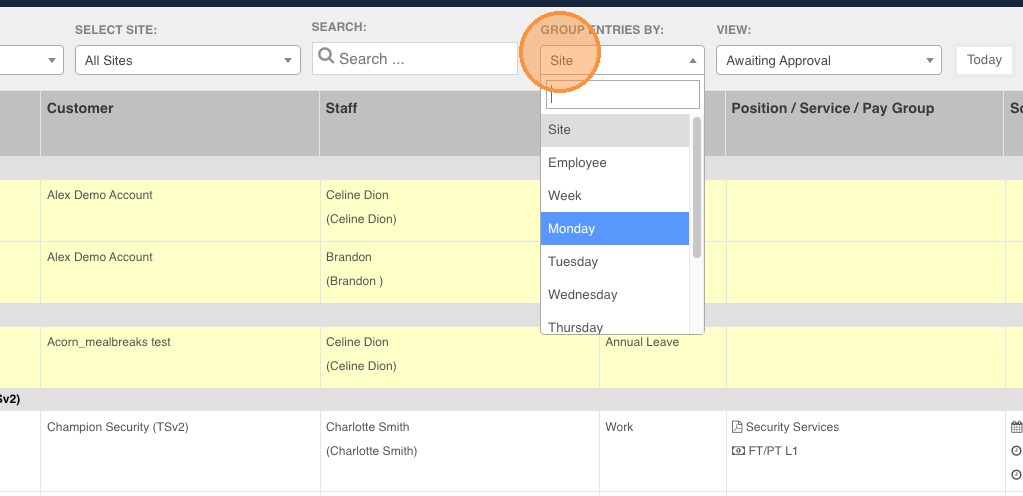
7. Use the option Group Entries By if you would like to filter by Site, Employee, Week, or Day.
8. Use View to show the following:
- Approved - Shows only approved timesheets.
- Awaiting Approval - Shows all timesheets that need to be actioned (timesheets that need to be approved or rejected). This is the default view when Timesheets is opened.
- All - Show all timesheets that are approved, awaiting aproval, and rejected

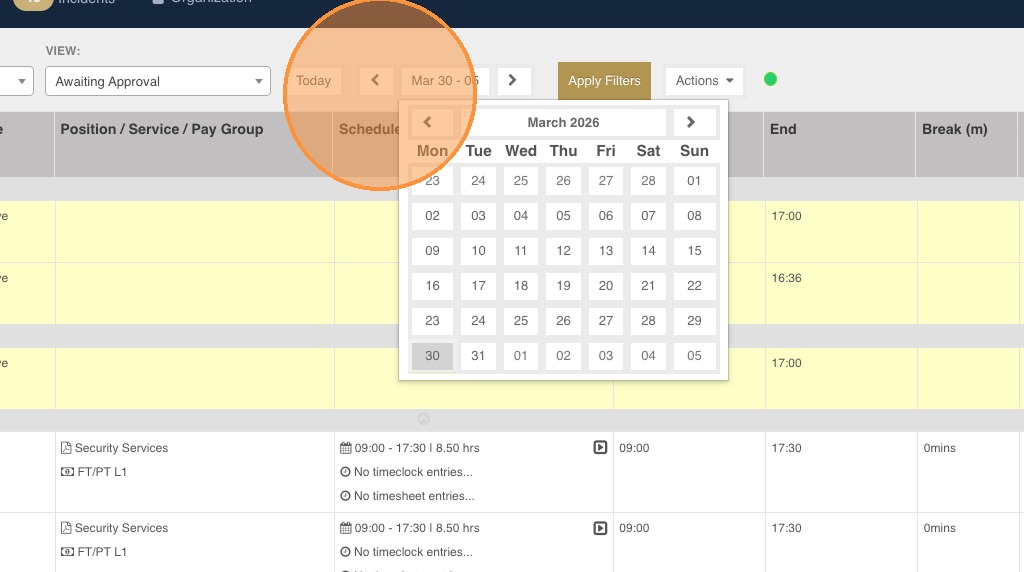
9. Make sure that when you approving timesheets, you are in the the correct date range.
- Today - Click this to go to the current week.
- Calendar - Click this to go to a particular week.
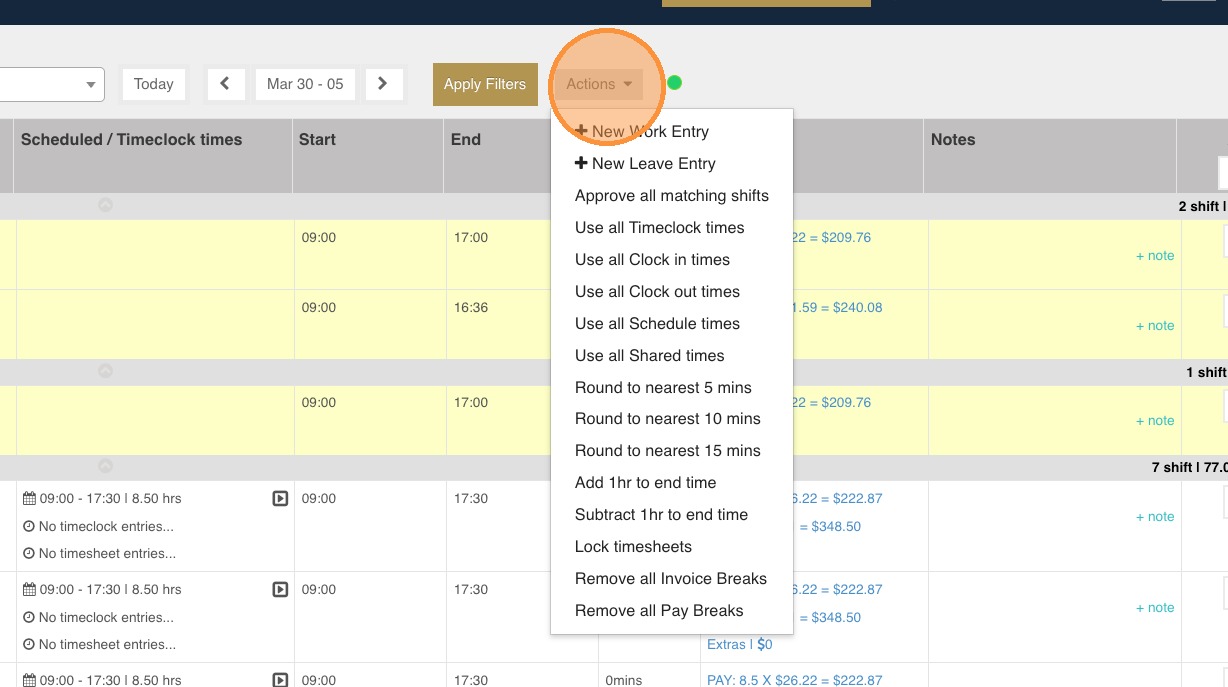
10. Use the Actions button for the following:
- +New Work Entry - Add a new timesheet. This entry will reflect in the timesheet reports but not on the Schedule page.
- +New Leave Entry - Add a leave on the Timesheets section. This will reflect on the timesheet reports but not on the Schedule page and Dashboard.
- Approve all matching shifts - The system will approve all shifts with the same start and end times under the columns Scheduled/Timeclock Times, Start, and End.
- Use all Timeclock times - The system will use the actual clock-in and clock-out times of employees. This will include manager/admin clock-in/clock-out.
- Use all Clock-in times - The system will use the actual clock in time and retain the rostered clock-out time.
- Use all Clock-out times - The system will retain the rostered clock-in time and use the actual clock-out time.
- Use all Schedule times - This is the default in Timesheets. The system will use the rostered clock-in and clock-out times.
- Use all Shared times - This is available only to subcontractors using the subcontractor sharing feature of Guardhouse. The system will use the approved clock-in and clock-out times of the top company.
- Round to the nearest 5 mins
- Round to the nearest 10 mins
- Round to the nearest 15 mins
- Add 1 hr to end time - This can be used by those affected by the start of Daylight Saving.
- Subtract 1 hr to end time - This can be used by those affected by the end of Daylight Saving.
- Lock Timesheets - The system will remove the ability to edit timesheets. This can only be unlocked by a Super Admin.
- Remove all Invoice Breaks
- Remove all Pay Breaks
11. When you're happy with the Timesheet view/filter, you can proceed to reviewing timesheet data before you approve or reject it. One major change in Timesheets v2 is the removal of the Save button. Action on the Timesheets page will now be auto-saved.
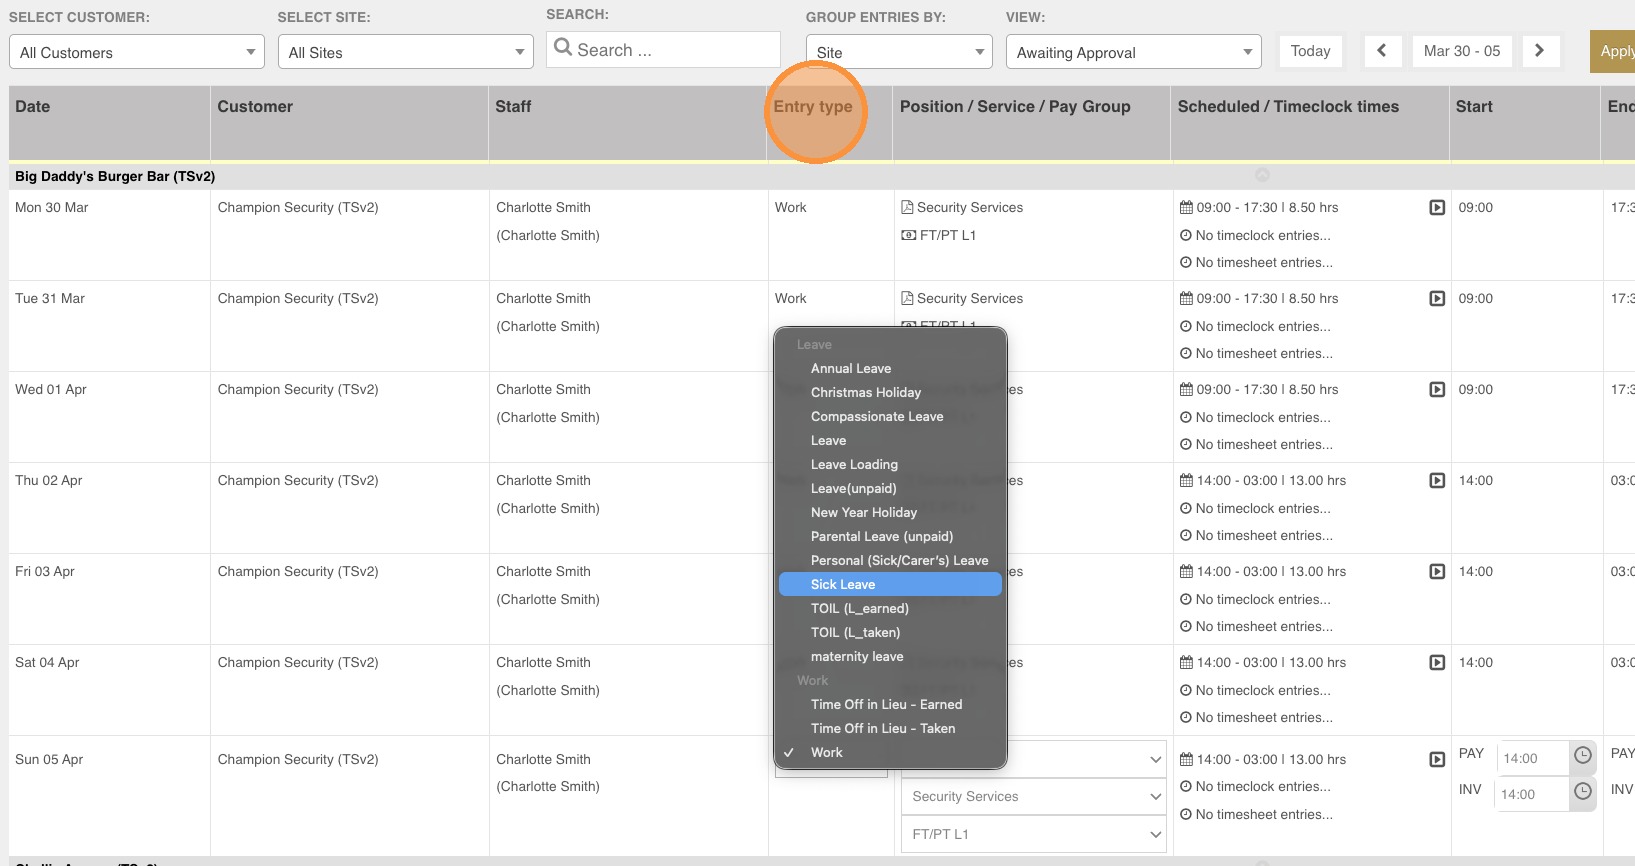
12. Ensure that the employee has the correct Entry Type for the day. The default entry type is Work but this can be changed to a leave as needed.
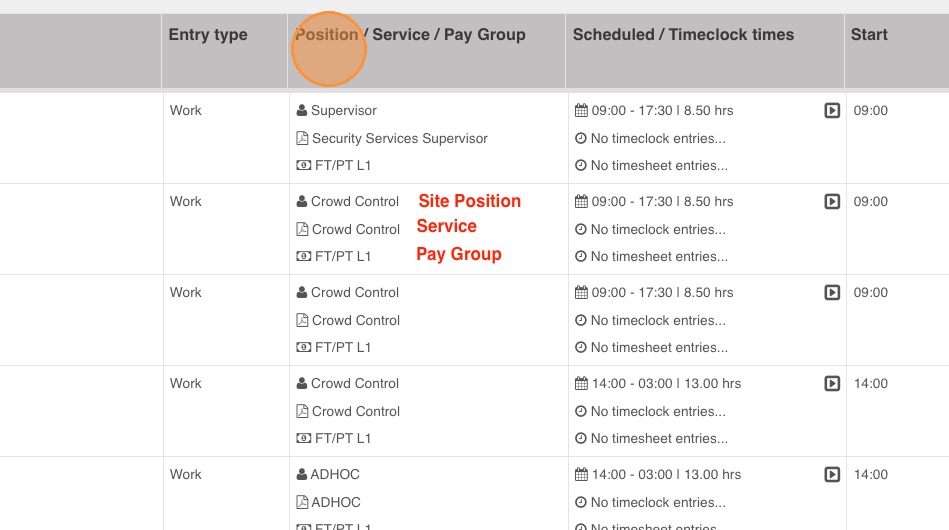
13. Ensure that there is a charge and pay group assigned to a timesheet as these will flow to the Paysheets and Invoicing sections when the timesheet is approved.
- Position - First row: This is the site position as allocated in the Schedule page. This can be manually added in the Timesheets section.
- Service - Second row: This is the charge rate allocated to the timesheet. This flows to the Invoicing section once the timesheet is approved.
- Pay Group - Third Row: This is the pay allocated to the shift. This flows to the Paysheets section once the timesheet is approved.
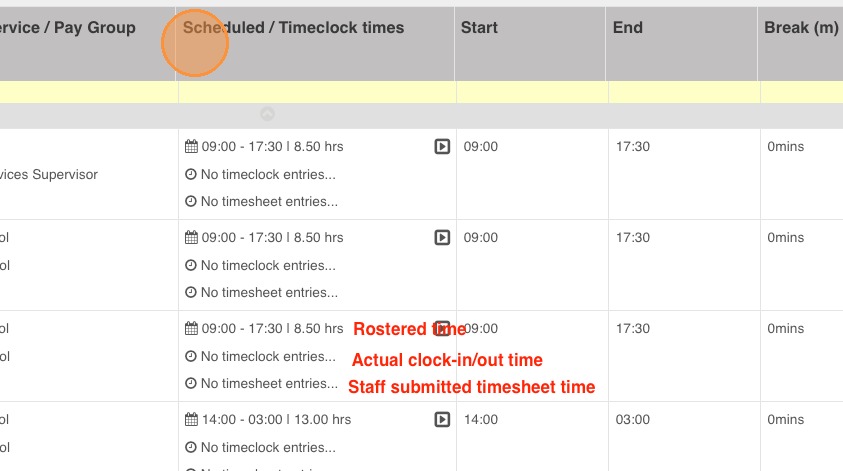
14. Ensure the correct start and end time of the timesheet. You have the option to use the following under the Scheduled/Timeclock Times column:
- Rostered time - This is the default in the Timesheets section. It uses the clock in and clock out time as set in the Schedule page.
- Actual Clock in and Clock out time - This is based on the employee's clock-in and clock-out as recorded on the Guardhouse app.
- Staff submitted timesheet times - This is available when the submission of staff timesheets is enabled in the system. This is based on the manual clock-in anc clock-out entry of the employee.
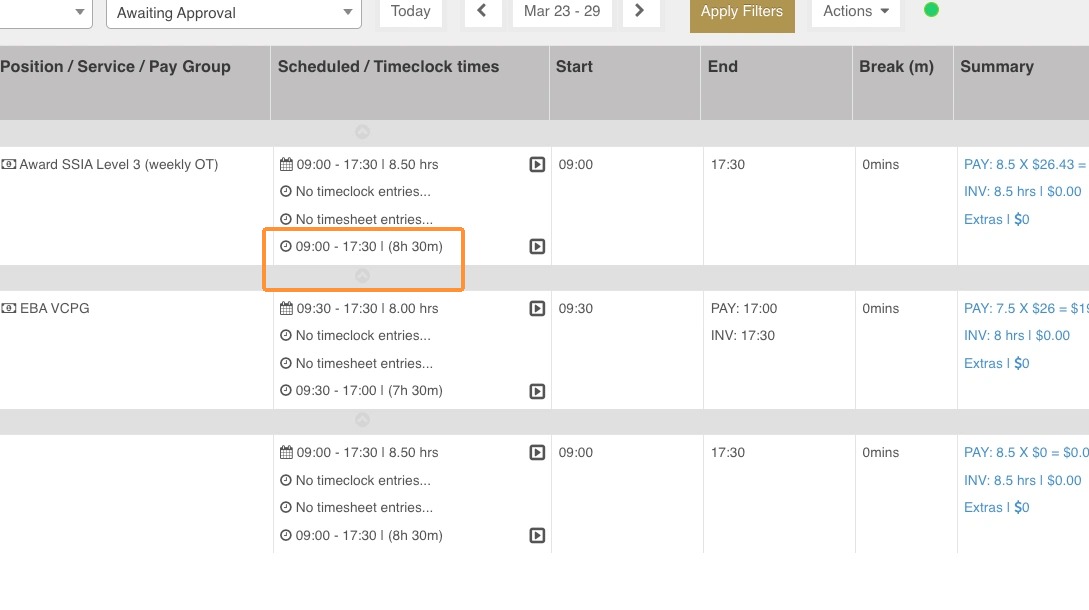
- Shared Time - This is available only for subcontractors using the shift sharing feature of Guardhouse.
15. Subcontractor Timesheets with shared times option.
16. The start and end time of a shift can also be manually adjusted on the Start and End columns. With Timesheets v2, you can now manually adjust the hours you'll be paying your employee and the hours you'll be charging your client.
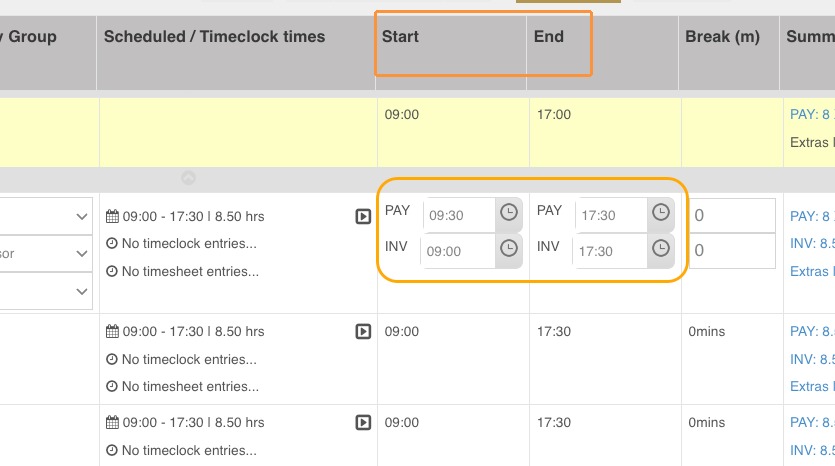
17. Break times can also be added and adjusted on the Break (m) column. Adjustments can be done individually on the pay and invoicing rows.

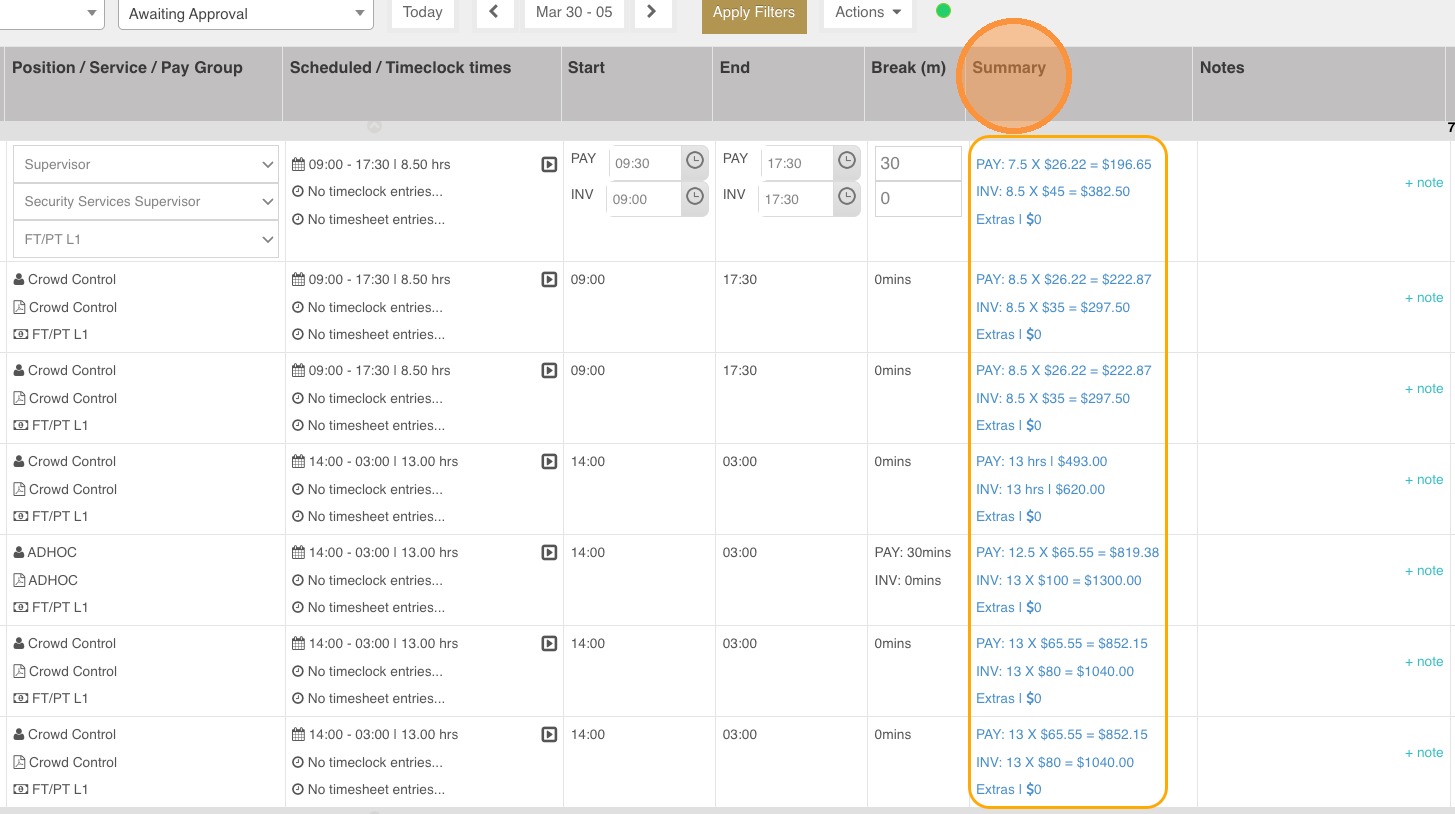
18. The Summary column will now show the calculation of the shift pay and charge based on what has been used in the following columns:
- Scheduled / Timeclock times
- Start and End
- Break (m)
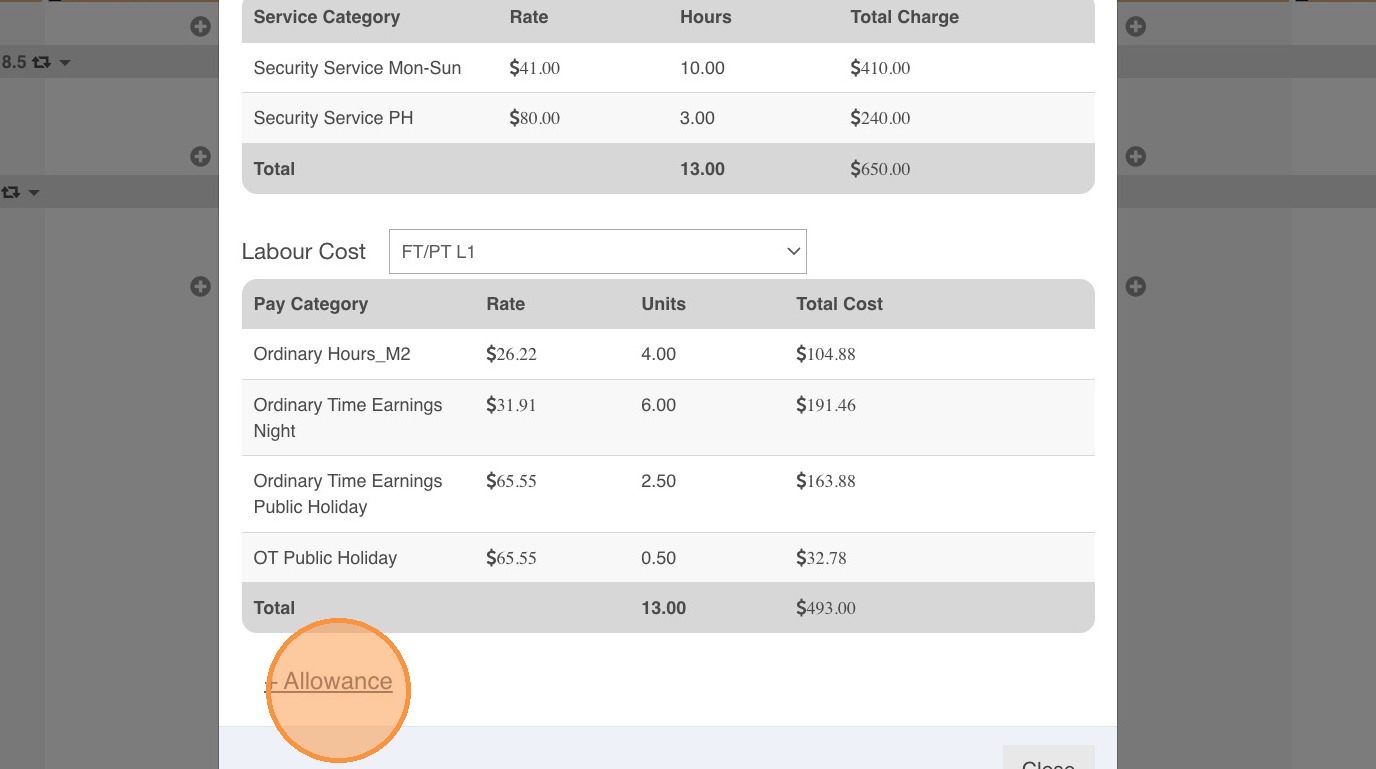
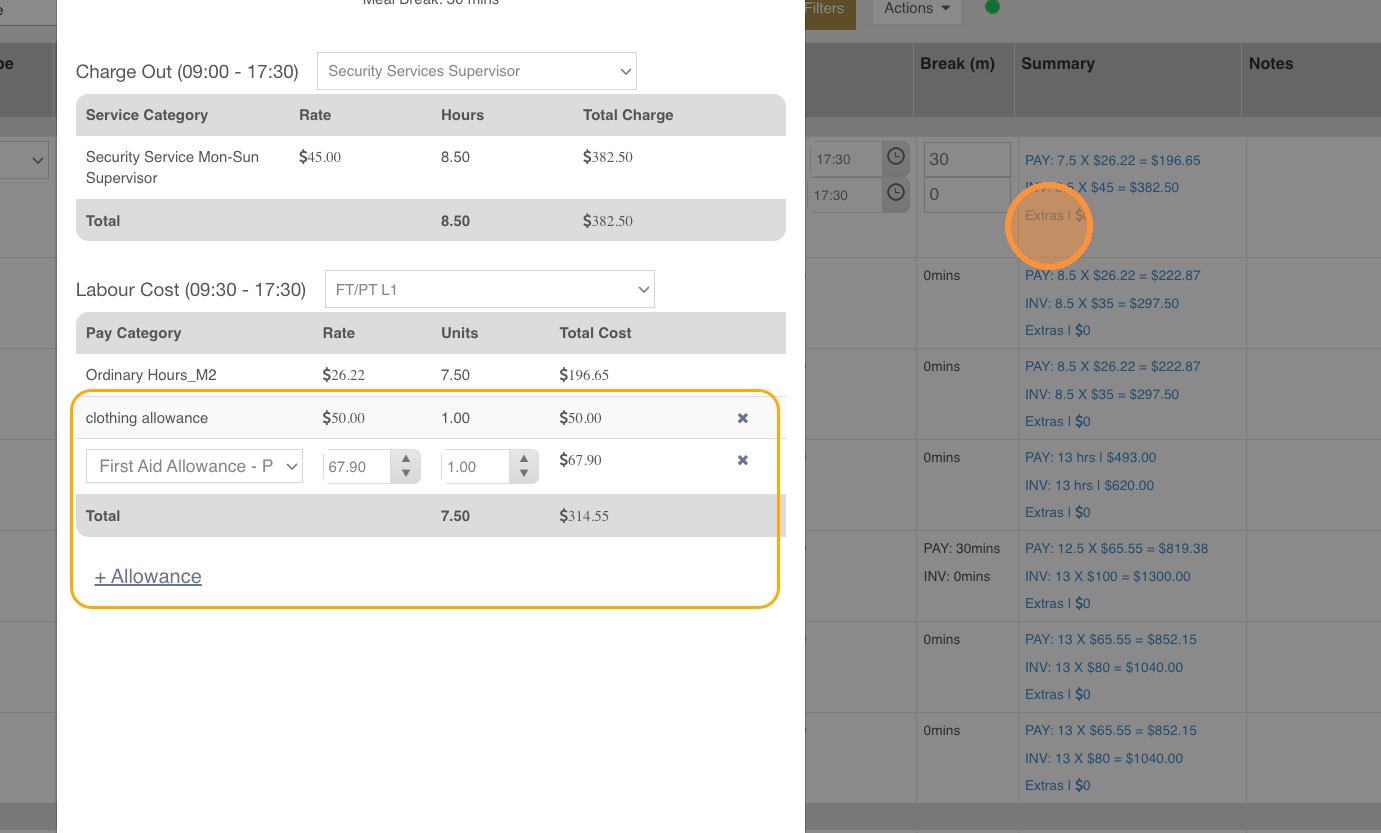
19. Allowances can be added in the Timesheets section. The same interface as shown in the Schedule page will show when adding allowances on the Timesheets section.
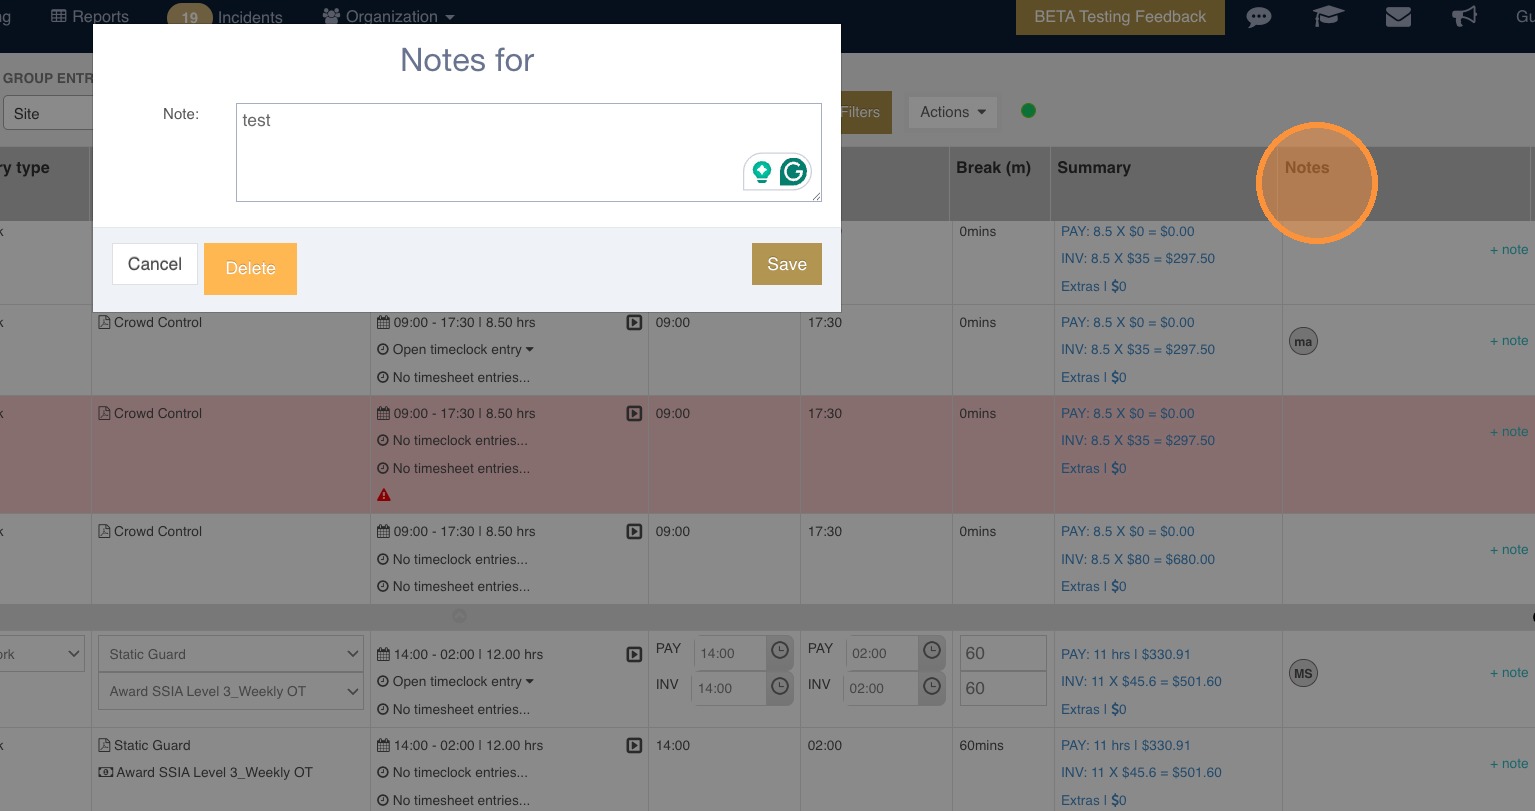
20. Notes added by guards/administrators/managers can be viewed on the Notes column. With Timesheets v2, notes can now be edited and/or deleted.
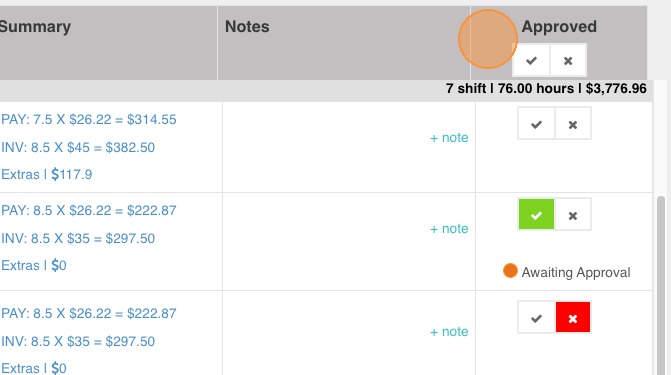
21. Once a timesheet is reviewed and adjusted as needed, approve or reject the Approve column. Timesheets can be appproved or rejected individually or by bulk.
- ✓ - Approves a timesheet and the data will automatically be saved.
- x - Rejects a timesheet and the data will automatically be saved. Rejected timesheets remain in the Timesheets section and will show in the timesheets reports; however, the data will not show in the Paysheets and Invoicing sections.
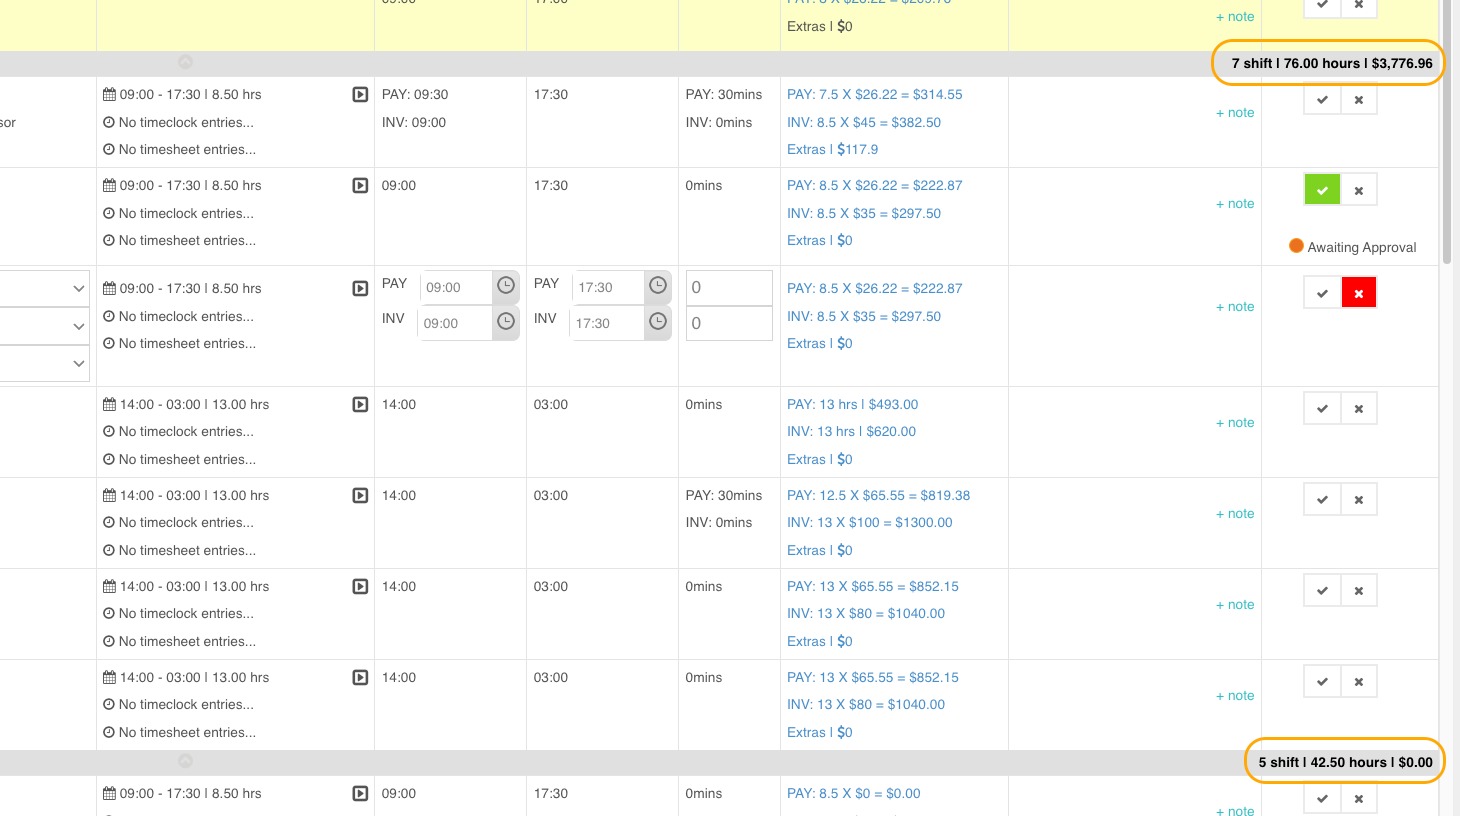
Note: Timesheets v2 now shows the summary of shifts per customer.
Note: The date section will no longer be clickable to allow the moving of shifts to a different site and/or customer. For such changes, the following actions can be taken:
- Create the correct shift on the Schedule page and approve it on the Timesheets section. Reject the incorrect shift.
- Reject the incorrect shift on the Timesheets section. Create an unscheduled shift with the correct details and approve it. Any unscheduled shift created in the Timesheets section will not reflect on the Schedule page.
Note: Color warnings remain the same in Timesheets v2.
- Yellow = unscheduled shift
- Red = overlapping shifts / duplicate shifts