To create an incident report, navigate to the Incidents tab:
![]()
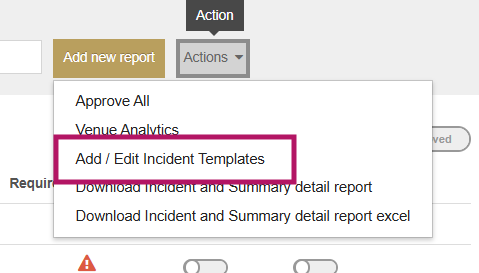
Then navigate to 'Actions':

Select 'Add / Edit Incident Templates':
Click to 'Add New Form Template':

When creating a form template as standard on an incident report, it will generate with a Report ID (which the system will generate by default), Customer, Site, Site Address, Submitted By, Submitted On Date/ Time, and the License Number of the person submitting the form.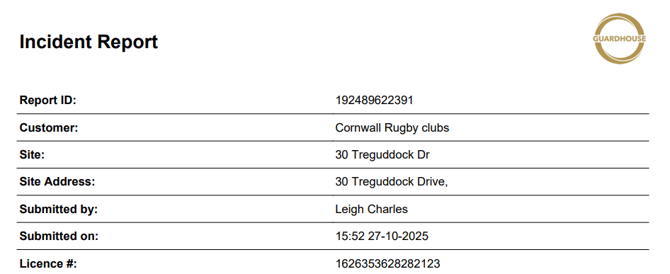
NOTE: For AU, the Master Licence is also captured by the system by default. The master licence can be added in Organization > Company > Invoicing > Invoice > Invoice Details > Licence #.

When creating the form, you will be asked to input a form name. This will appear as selectable on the app for the guards and at the top of the form once submitted:

You can then start building out questions.
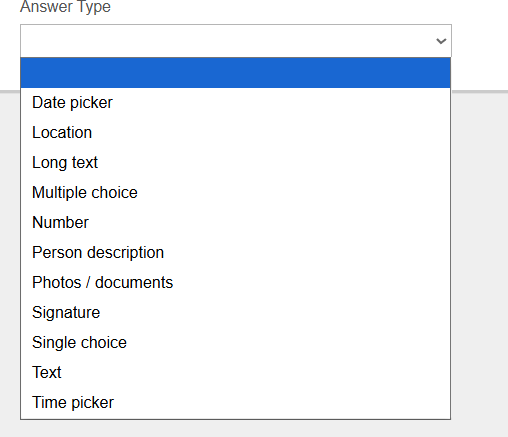
The answer type options are as follows:
-
Date Picker: This allows the guard to select a date, as the event date may differ from that of the form completion.

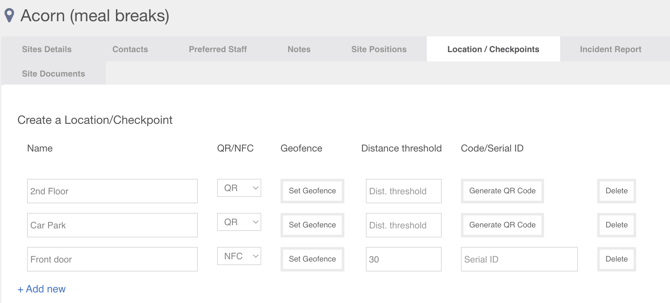
- Location: This allows the guard to select the location of the incident. Please note that location options should be added under the Location/Checkpoint section of the site/s.

- Long Text: This is a text box with a 1,500-character limit and is best used for narrative:

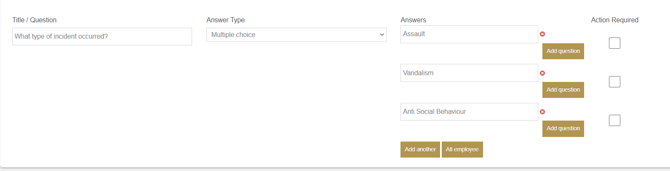
- Multiple Choice: This allows multiple answers to be selected. A sub-question can also be added under each answer.

- Number: This allows you to build a series of question paths based upon the number selected within the answer, using sub-questions:
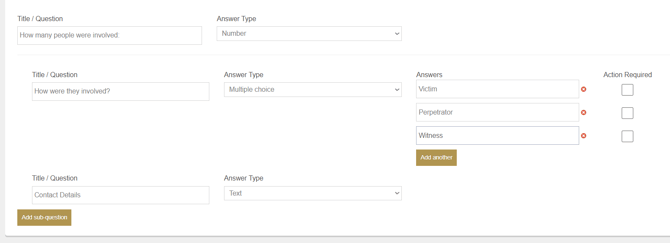
For example, if the above was answered as two people involved, two sets of the sub-questions would be generated for the individual completing the form
-
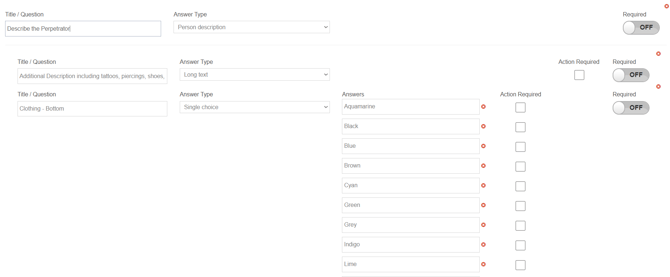
Person Description: Generates a comprehensive template of personal identification, gender, race, hair colour, etc. This is editable information that can be customised based on your requirements:
-
Photos: This allows up to five photos per question to be added (you can have multiples of this question on one form):

-
Signature: Allows an e-signature on the form, which will be viewable in the downloadable PDF once submitted:

-
Text: This is free text capped at 200 characters and is best for short sentence answers:

-
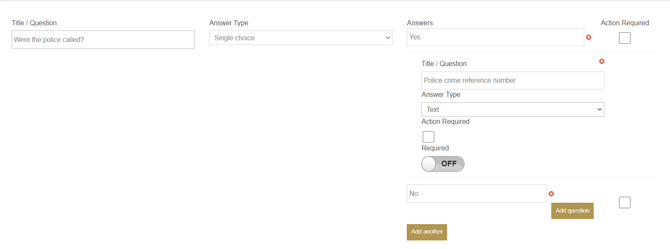
Single Choice: This allows for single selection responses, with the option of sub-questions based on the answer picked. All question responses can have a selectable answer:
-
Time Picker: This allows the guard to select a time, as the event time may differ from that of form completion:

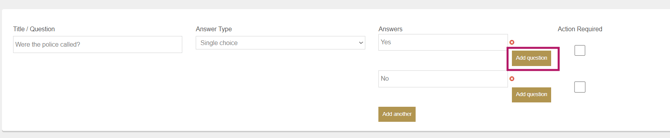
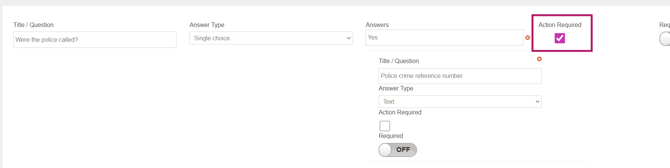
The option Action Required provides a warning triangle to admins on the dashboard when a certain answer is selected. For example, with this question, the selection of 'Yes' will trigger the warning:
![]()
The 'Required' toggle means that the form cannot be completed and submitted unless this question is answered:

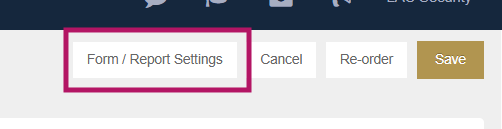
Form / Report Settings control who is able to fill out the form. To access, click 'Form / Report Settings:
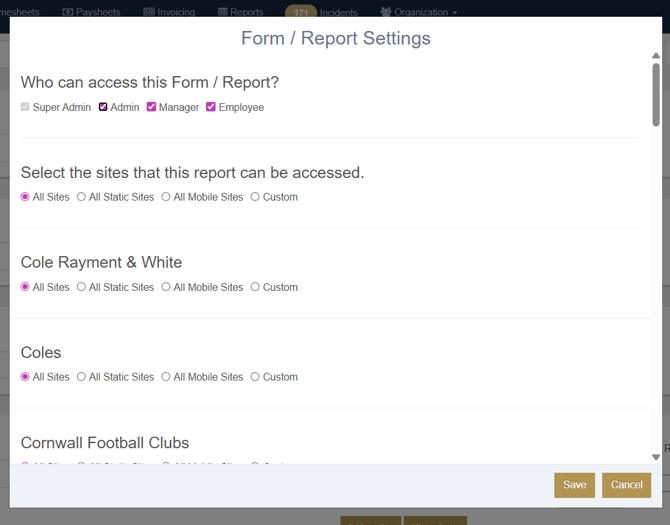
You can select which access permissions can access this form and which sites the form is available to be completed at:
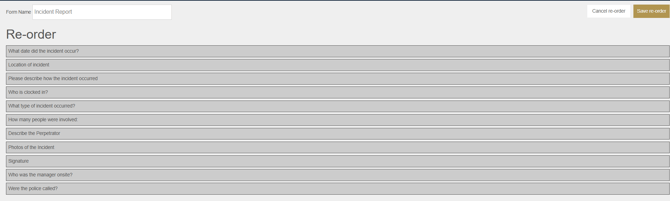
You can also reorder questions by clicking 'Re-order' and dragging and dropping:
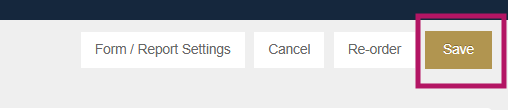
Once you are happy with the form, click 'Save':
The form will now be available to be completed by those who have the required access permissions. You can edit forms and update their questions as required.